


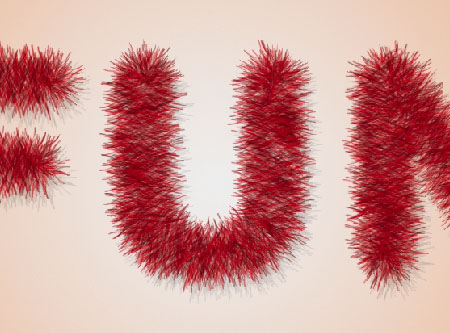
In this tutorial, we are going to use some brushes, layer styles, and different blend modes, to create a super fun looking tinsel-like text effect.
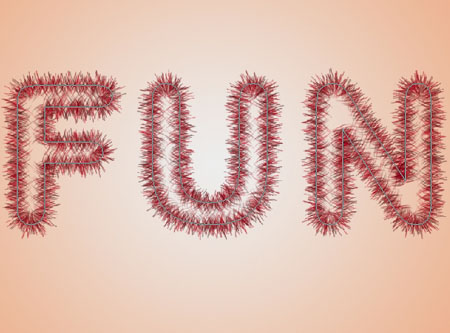
The Final Result:

Notes:
* the software used in this tutorial is Adobe Photoshop CS5 Extended
* the size of the final result image is 1024 * 768
* you might want to check the Basix Page to see some useful topics on dealing with Photoshop basics, such as loading palettes and some shortcuts.
* the size of the final result image is 1024 * 768
* you might want to check the Basix Page to see some useful topics on dealing with Photoshop basics, such as loading palettes and some shortcuts.
Resources:
Step 1:
- Set the Foreground color to #eeebe9, and the Background color to #f5a883, then, create a Radial Gradient from the center of the document to one of the corners.
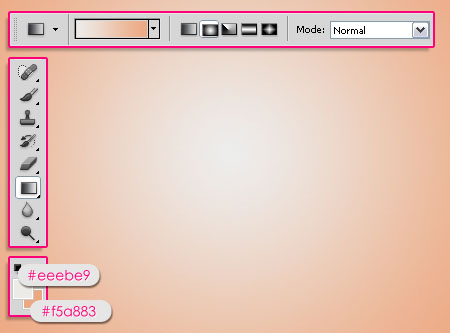
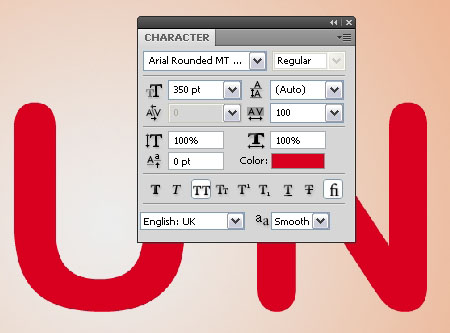
- Create the text using the font “Arial Rounded MT Bold” in “All Caps”. The size is 350 pt, and the Tracking value is set to 100 px to avoid overlapping.
Step 2:
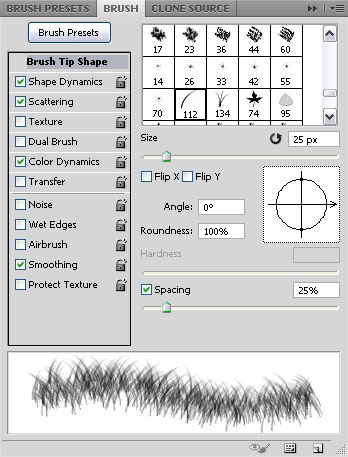
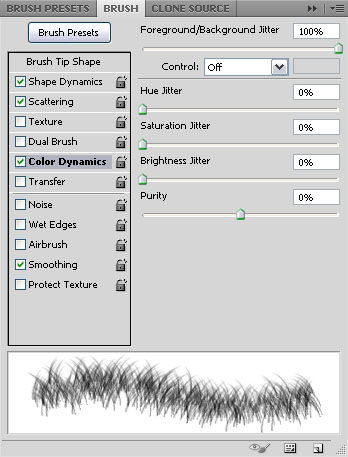
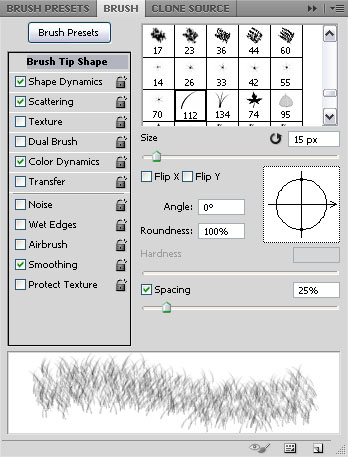
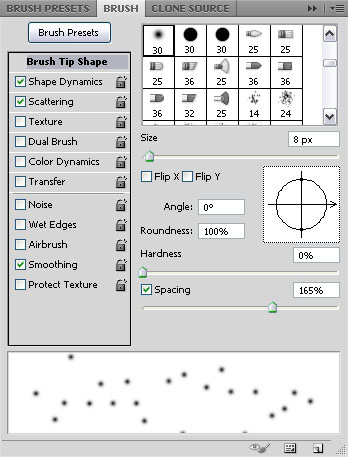
Open the Brush panel (Window -> Brush), pick the Dune Grass brush, and change the settings as shown below:
- Brush Tip Shape:
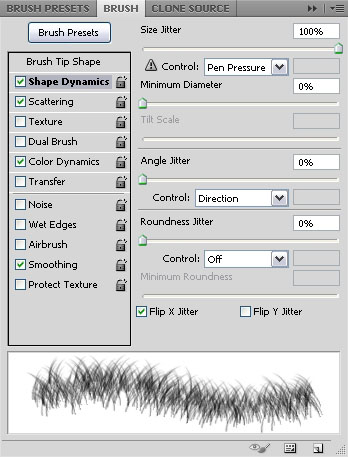
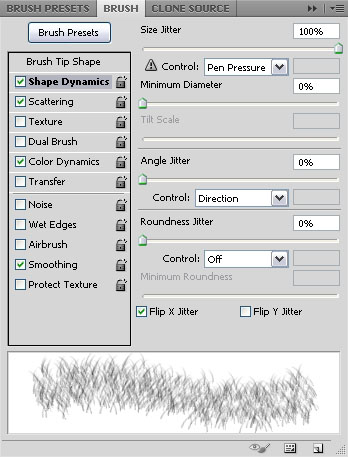
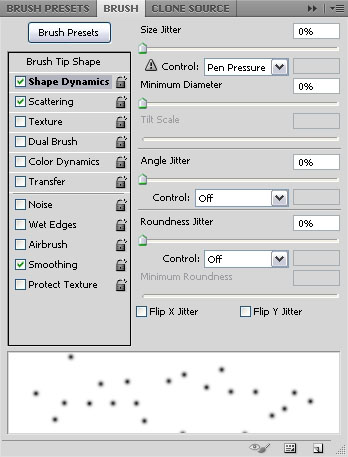
- Shape Dynamics:
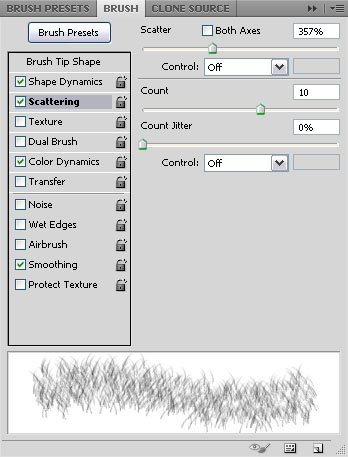
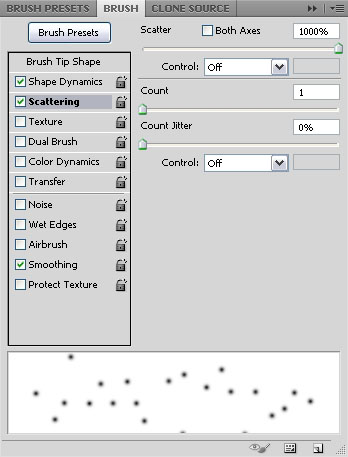
- Scattering:

- Color Dynamics:
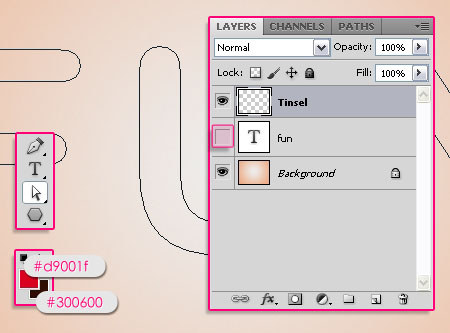
- Right click on the text layer and choose Create Work Path.

- Create a new layer on top of all layers and call it “Tinsel”. Make the text layer invisible by clicking the eye icon next to it, and pick the Direct Selection Tool. Set the Foreground color to #d9001f, and the Background color to #300600.
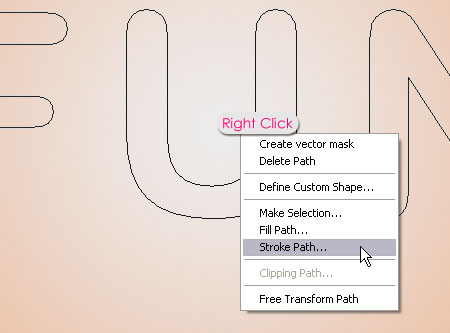
- Right click on the path and choose Stroke Path.
- Choose Brush from the Tool drop down menu and make sure that the Simulate Pressure box is un-checked.
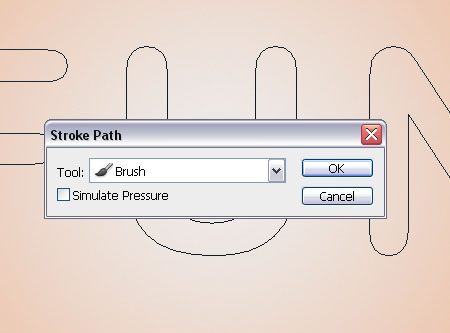
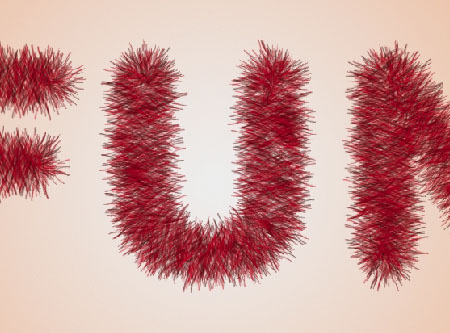
- This will stroke the path with the brush you’ve just modified. You can hit Enter to get rid of the Work Path.
- Using the same brush, fill in the middle part of the text that was not covered with the stroke. Try not to overdo it.
It’s ok to have some empty areas as well, so there’s no need to go back and forth on the same area, because this will ruin the texture.
Step 3:
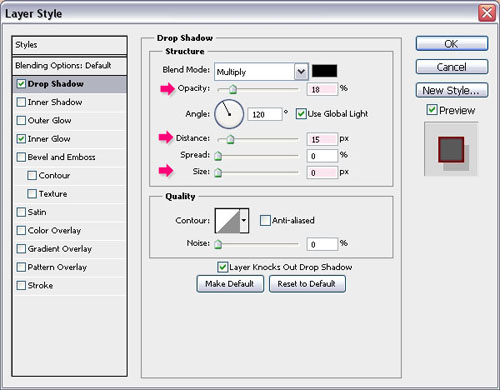
Double click on the “Tinsel” layer to apply the following layer styles:
- Drop Shadow: Change the Opacity to 18%, the Distance to 15, and the Size to 0.
- Inner Glow: Change the Blend Mode to Linear Light, and the color to #9d1c24.
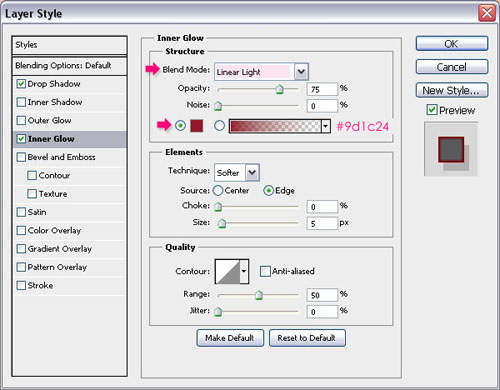
- This will add a subtle red glow.
Step 4:
Open the Brush panel (Window -> Brush) and pick the Dune Grass brush once again, then change the settings as shown below:
- Brush Tip Shape:
- Shape Dynamics:
- Scattering:
- Color Dynamics:

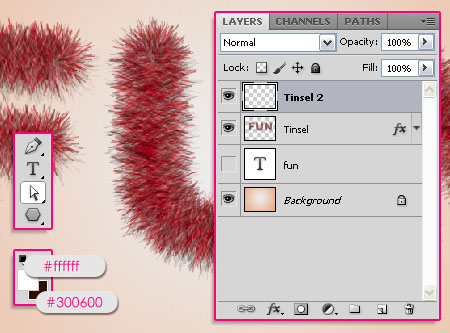
- Right click on the text layer and choose Create Work Path. Create a new layer on top of all layers and call it “Tinsel 2″. Set the Foreground color to #ffffff, and the Background color to #300600. Stroke the path with the new brush and hit Enter to get rid of the Work Path.
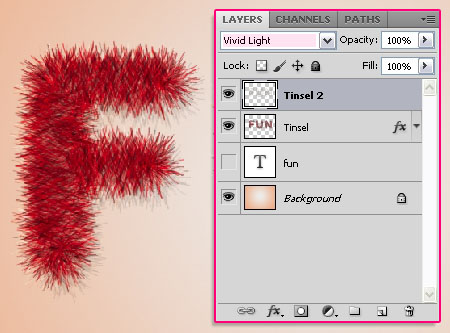
- Change the “Tinsel 2″ layer’s Blend Mode to Vivid Light.
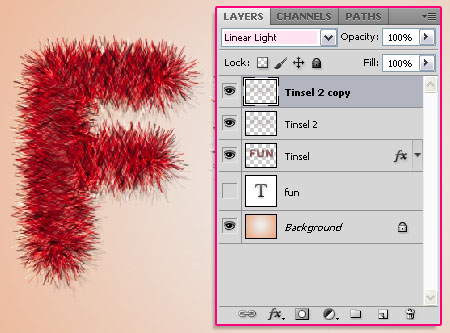
- Duplicate the “Tinsel 2″ layer and change the copy’s Blend Mode to Linear Light. This will make the stroke more vivid.
Step 5:
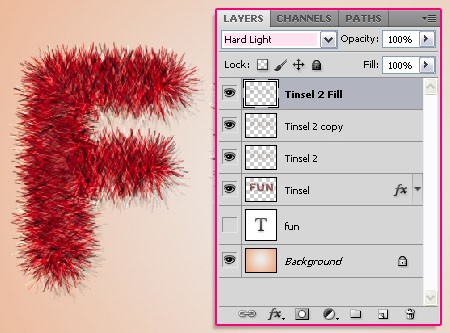
- Create a new layer on top of all layers and call it “Tinsel 2 Fill”. Use the same brush you created in the previous step to fill the middle (empty) part, just like you did in the end of Step 2.
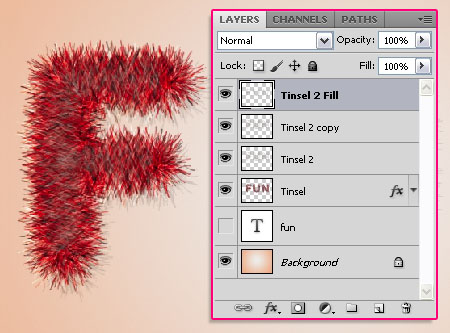
- Change the “Tinsel 2 Fill” layer’s Blend Mode to Hard Light.
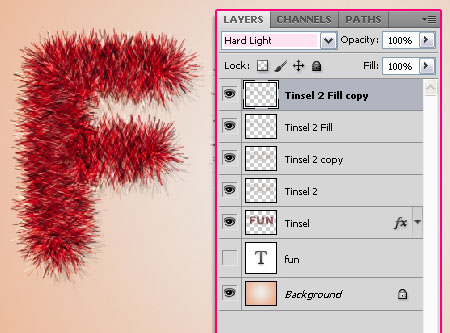
- Duplicate the “Tinsel 2 Fill” layer.
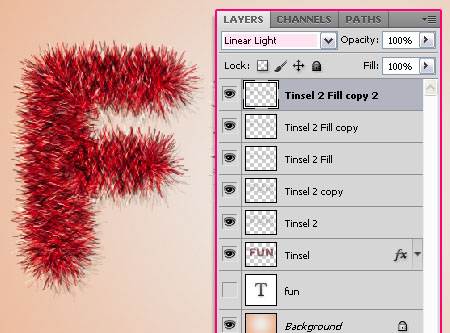
- Duplicate the “Tinsel 2 Fill copy” layer, and change its Blend Mode to Linear Light.
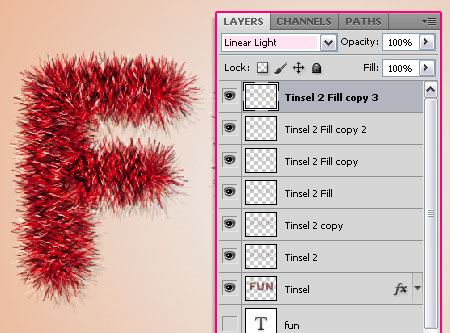
- Duplicate the “Tinsel 2 Fill copy 2″ layer. The duplicated layers with the different Blend Modes will help create a nice bright texture for the Tinsel.
Step 6:
Choose a soft round brush, and modify its Settings in the Brush panel (Window -> Brush) as shown below:
- Brush Tip Shape:
- Shape Dynamics:
- Scattering:
- Set the Foreground color to #eeebe9. Create a new layer on top of all layers and call it “Sparkles”, then start painting some dots all over the Tinsel.
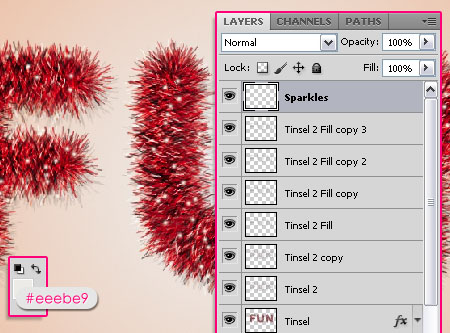
- Double click on the “Sparkles” layer and apply an Outer Glow layer style. Change theBlend Mode to Vivid Light and the color to #ffffff.
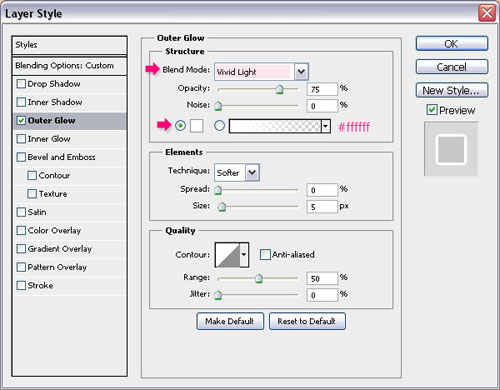
- Change the “Sparkles” layer’s Blend Mode to Vivid Light.

Step 7:
- Create a new layer on top of all layers and call it “Stars”.
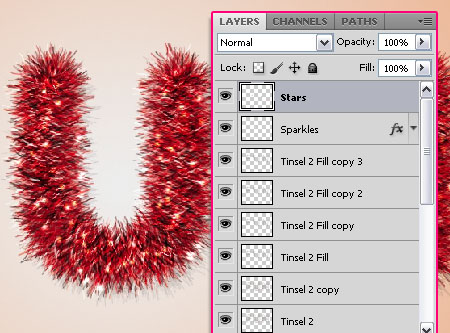
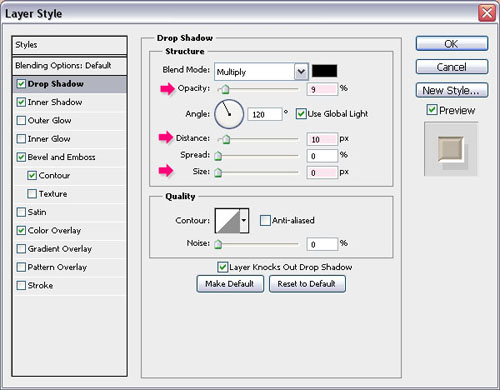
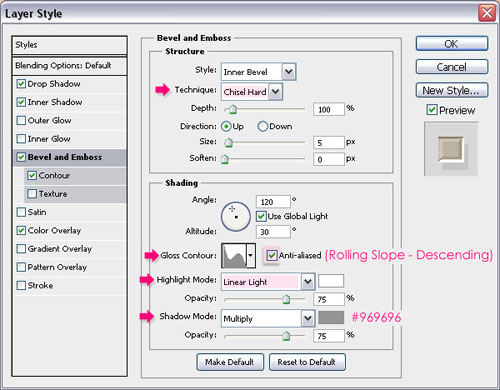
Double click the “Stars” layer to apply the following Layer Styles:
- Drop Shadow: Change the Opacity to 9%, the Distance to 10, and the Size to 0.
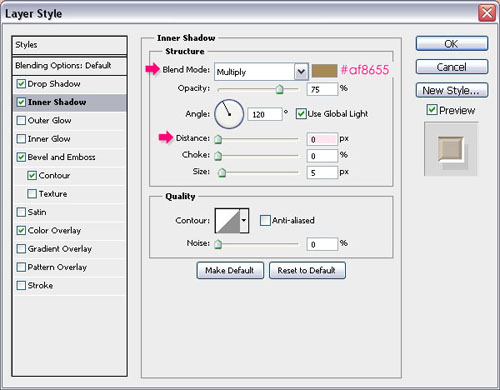
- Inner Shadow: Change the color to #af8655, and the Distance to 0.
- Bevel and Emboss: Change the Technique to Chisel Hard, the Gloss Contour toRolling Slope – Descending, and check the Anti-aliased box. Also, change theHighlight Mode to Linear Light and the Shadow Mode color to #969696.
Check this image to see how to load the contours if you don’t have them.
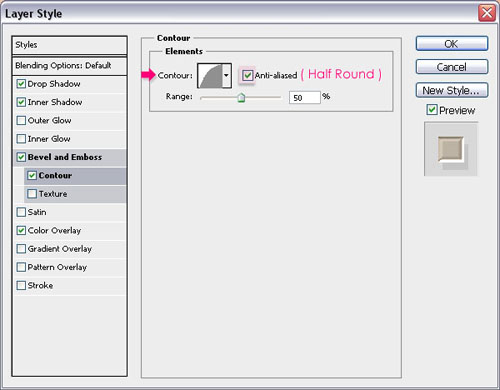
- Contour: Choose Half Round and check the Anti-aliased box.
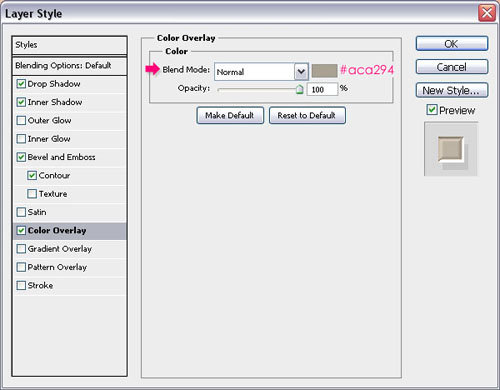
- Color Overlay: Choose the color #aca294.
- Use a star brush from the Moons and Stars – 17 Brushes pack to add some stars around the Tinsel.

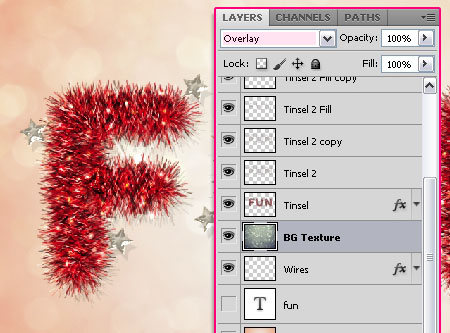
- Create a new layer below all Tinsel layers and call it “Wires”. Copy and paste the “Stars” Layer style to this layer. (Right click on the “Stars” Layer -> Copy Layer Style, then Right click on the “Wires” layer -> Paste Layer Style.)
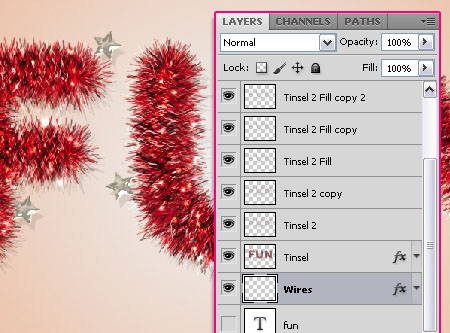
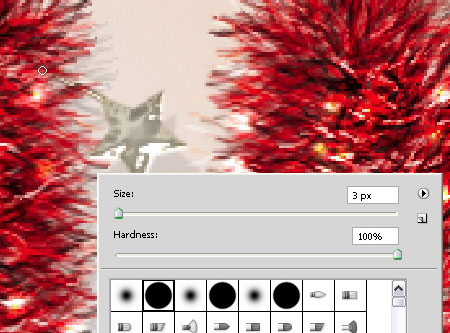
- Choose a hard round 3 px brush, and add some wires to attach the stars to the Tinsel. Choose the closest points to attach.
- Place the soft bokeh texture on top of the Background layer, resize it to fit, and change its Blend Mode to Overlay.
And that’s it! Hope you enjoyed the tutorial.
Categories:
Text Effect


0 comments:
Post a Comment