


This tutorial explains how to create a snow globe inspired text effect, using a couple of brushes and layer styles.
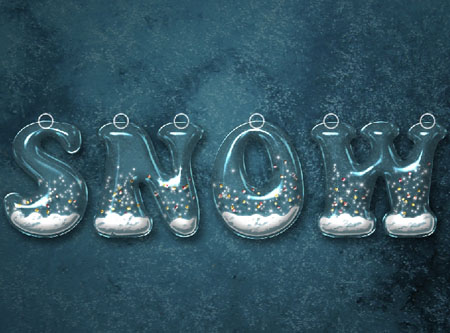
The Final Result:

Notes:
* the software used in this tutorial is Adobe Photoshop CS5 Extended
* the size of the final result image is 1024 * 768
* you might want to check the Basix Page to see some useful topics on dealing with Photoshop basics, such as loading palettes and some shortcuts.
* the size of the final result image is 1024 * 768
* you might want to check the Basix Page to see some useful topics on dealing with Photoshop basics, such as loading palettes and some shortcuts.
Resources:
* Frost texture by ~Rubyfire14-Stock.
* Brushes O5 (Sparkles Brushes) by ~apple-instinct.
* Golden Particles Gradient.
* Red Particles Gradient.
* Hangers Layer Style.
* Pins Layer Style.
* Brushes O5 (Sparkles Brushes) by ~apple-instinct.
* Golden Particles Gradient.
* Red Particles Gradient.
* Hangers Layer Style.
* Pins Layer Style.
Step 1:
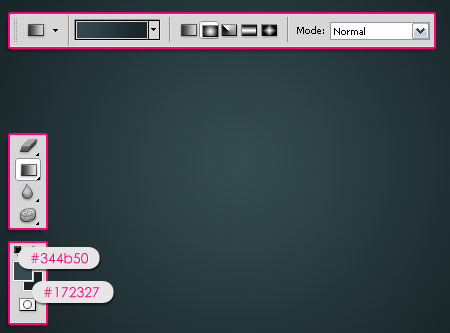
- Set the Foreground color to #344b50, and the Background color to #172327, then, create a Radial Gradient from the center of the document to one of the corners.
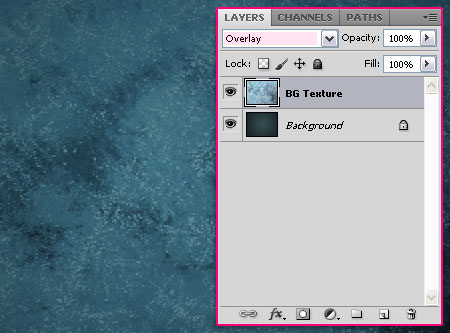
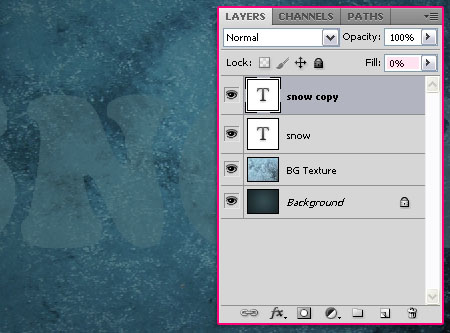
- Place the Frost texture on top of the Background layer, and change its Blend Mode toOverlay.
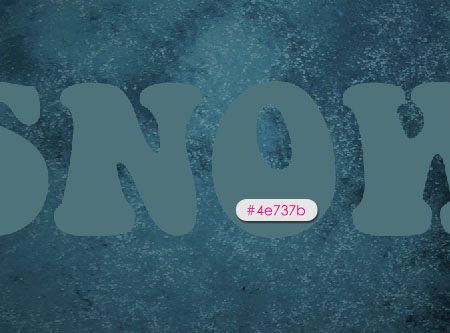
- Create the text using the font “Keep on Truckin’ FW” in “All Caps”. The size is 300 pt, and the color is #4e737b.
- Change the text layer’s Fill value to 50%.
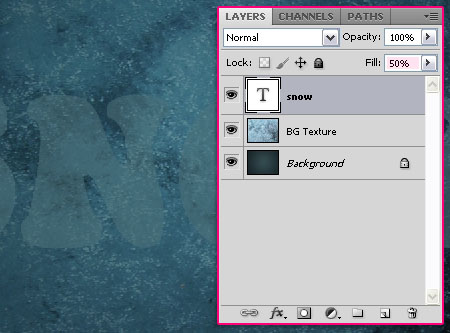
- Duplicate the text layer and change the copy’s Fill value to 0%.
Step 2:
- Double click the original text layer to apply the following Layer Styles:
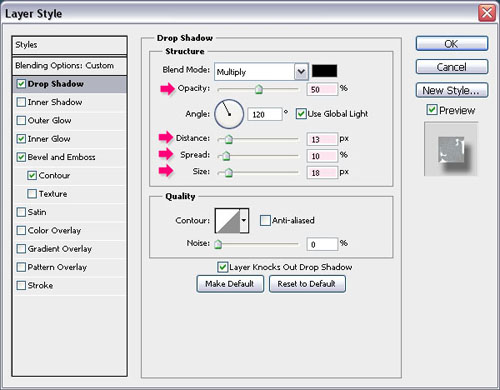
- Drop Shadow: Change the Opacity to 50%, the Distance to 13, the Spread to 10, and the Size to 18.
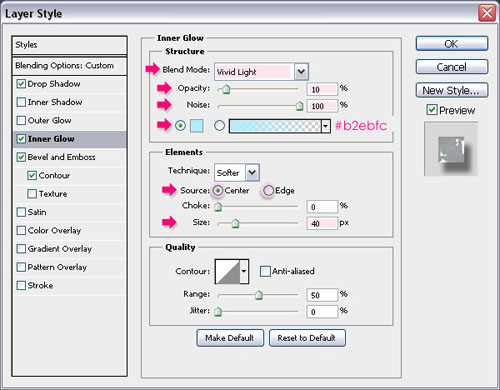
- Inner Glow: Change the Blend Mode to Vivid Light, the Opacity to 10, the Noise to100, the color to #b2ebfc, the Source to Center, and the Size to 40.
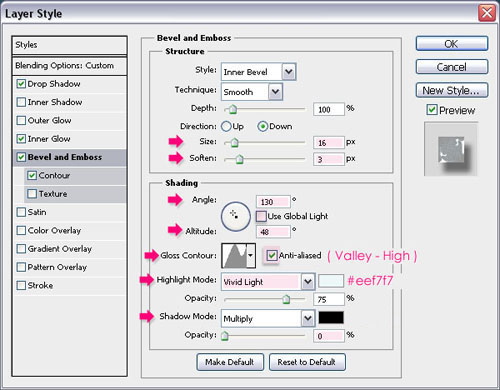
- Bevel and Emboss: Change the Size to 16 and the Soften to 3. Un-check the Use Global Light box, then change the Angle to 130 and the Altitude to 48. Check the Anti-aliased box, and choose Valley – High for the Gloss Contour. Also, change theHighlight Mode to Vivid Light and its color to #eef7f7, and change the Shadow ModeOpacity to 0%.
Check this image to see how to load the contours if you don’t have them.
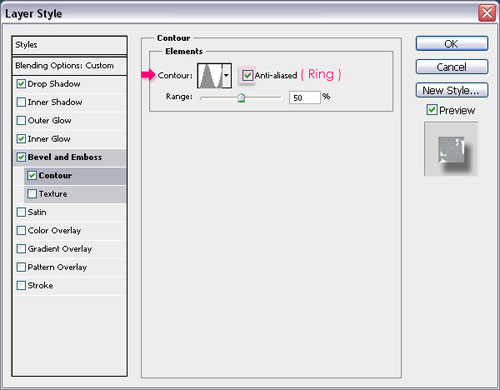
- Contour: Choose the Ring Contour, and check the Anti-aliased box.
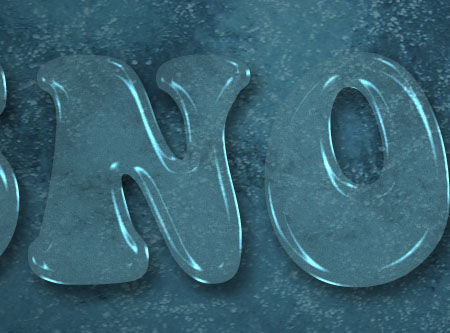
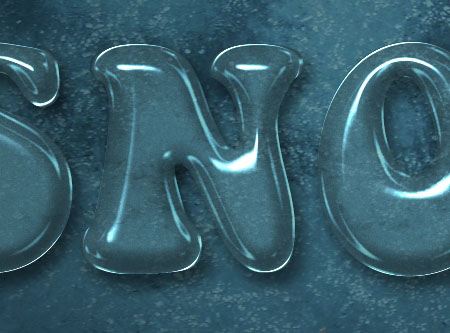
- This is how the text should look like.
Step 3:
- Double click the copy text layer to apply the following Layer Styles:
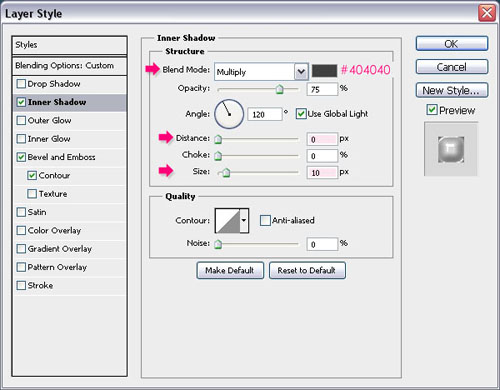
- Inner Shadow: Change the color to #404040, the Distance to 0, and the Size to 10.
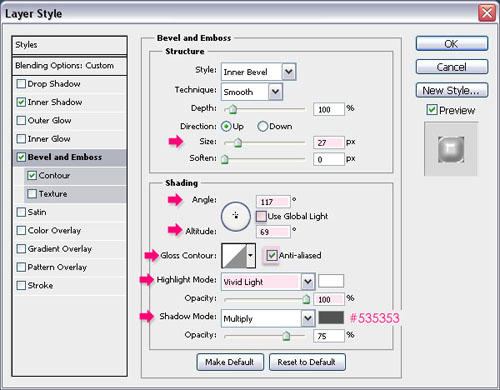
- Bevel and Emboss: Change the Size to 27. Un-check the Use Global Light box, then change the Angle to 117 and the Altitude to 69. Check the Anti-aliased box, change theHighlight Mode to Vivid Light and its Opacity to 100%, and change the Shadow Modecolor to #535353.
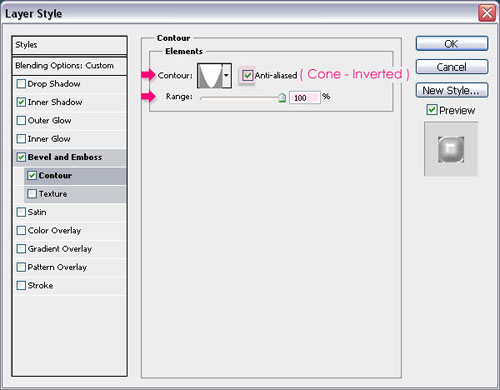
- Contour: Choose the Cone – Inverted Contour, check the Anti-aliased box, and change the Range to 100%.
- This is what you should get.
Step 4:
- Create a new layer between the two text layers and call it “Snow Fill”.

- Double click the “Snow Fill” layer to apply the following Layer Styles:
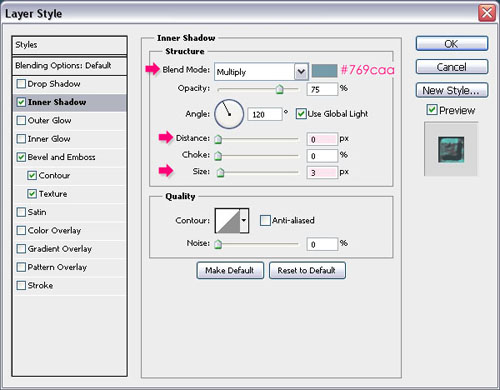
- Inner Shadow: Change the color to #769caa, the Distance to 0, and the Size to 3.
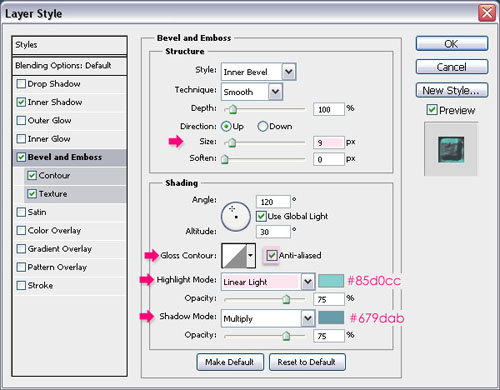
- Bevel and Emboss: Change the Size to 9, check the Anti-aliased box, change theHighlight Mode to Linear Light and its color to #85d0cc, and change the Shadow Mode color to #679dab.
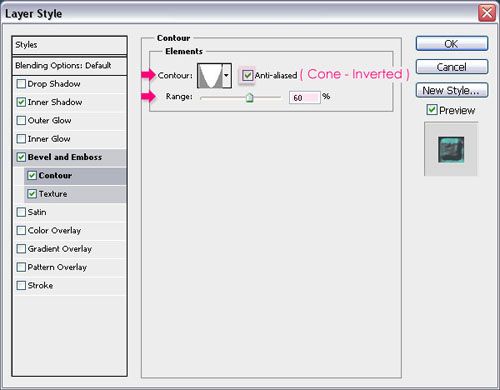
- Contour: Choose the Cone – Inverted Contour, check the Anti-aliased box, and change the Range to 60%.
- Texture: Choose the Clouds pattern.

- Click OK and open the Brush panel (Window -> Brush). choose a hard round brush and modify its settings as shown below:
- Brush Tip Shape:
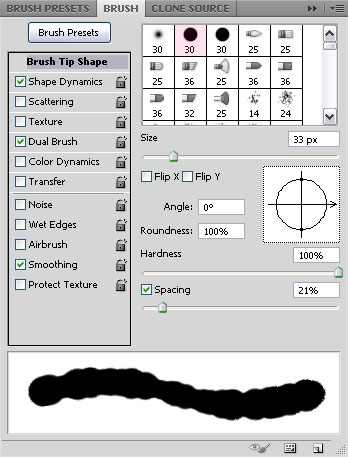
- Shape Dynamics:

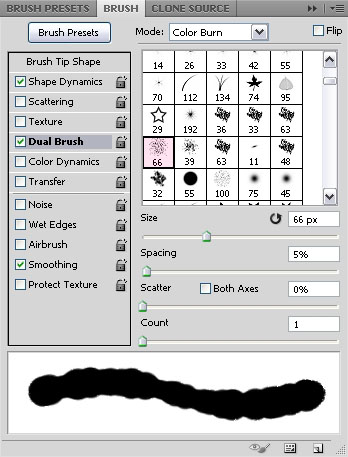
- Dual Brush:
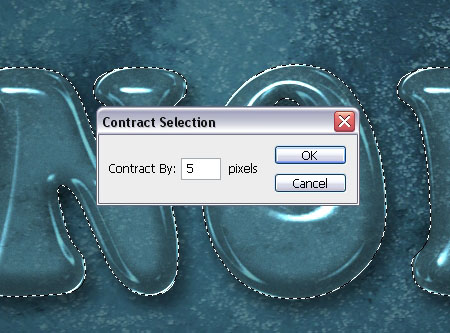
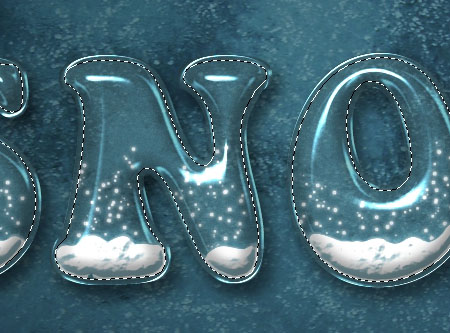
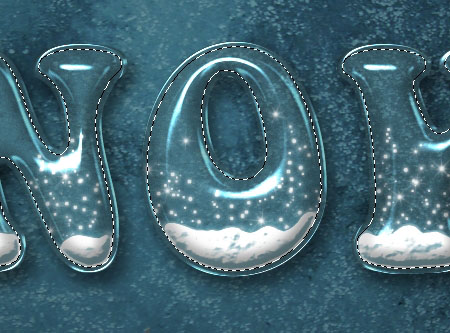
- Now, press the Ctrl key and click on a text layer’s thumbnail to create a selection.
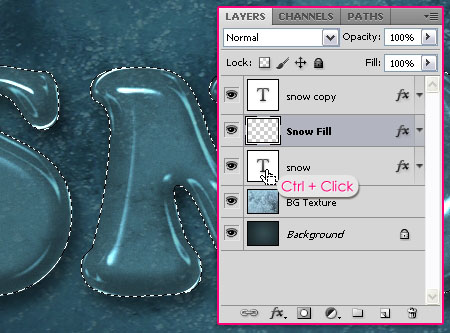
- Go to Select -> Modify -> Contract, and contract the selection by 5 px.
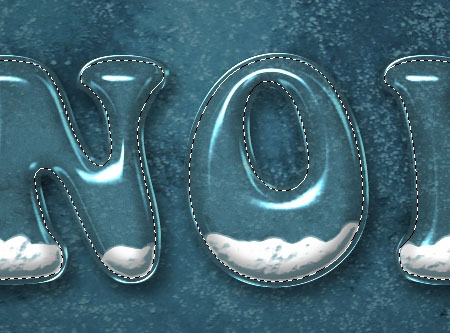
- Use the brush you’ve just modified to add some snow at the bottom of the letters.
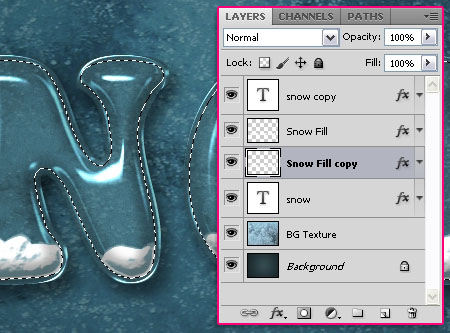
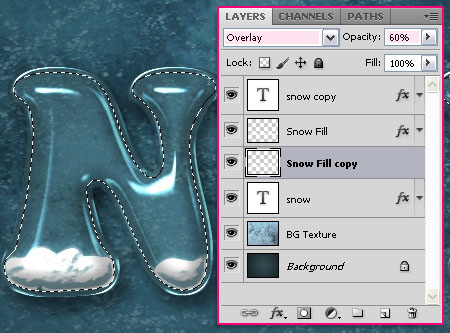
- Duplicate the “Snow Fill” layer, and drag the copy below it.
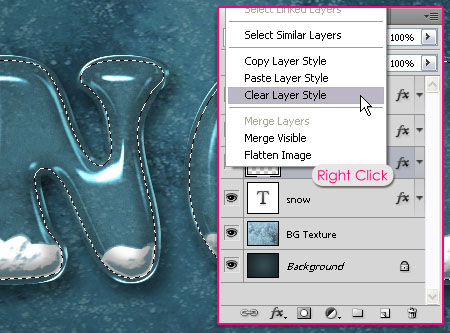
- Right click on the “Snow Fill copy” layer and choose Clear Layer Style.
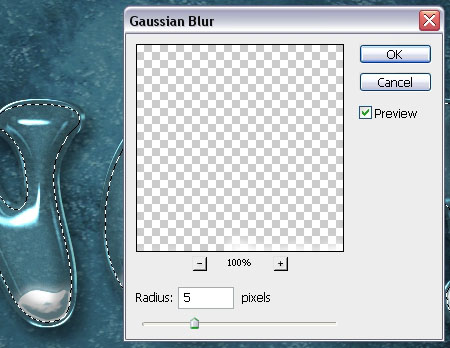
- Go to Filter -> Blur -> Gaussian Blur and type in 5 for the Radius.
- Change the “Snow Fill copy” layer’s Blend Mode to Overlay and its Opacity to 60%.
Step 5:
- Once again, go to the Brush panel, and choose a hard round brush, then change its settings as shown below:
- Brush Tip Shape:
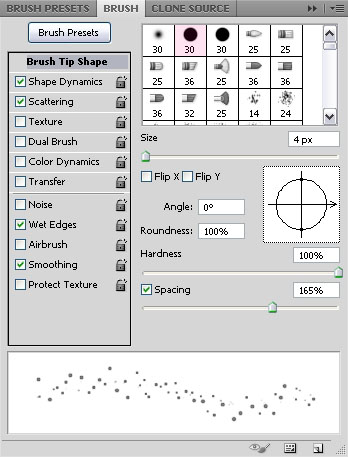
- Shape Dynamics:

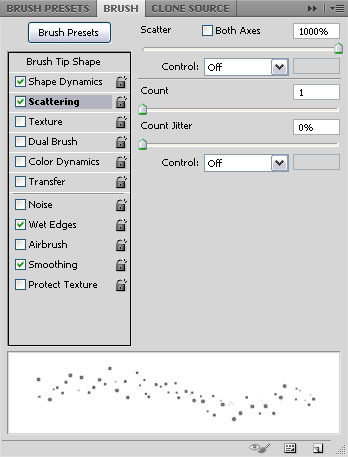
- Scattering:
- Check the Wet Edges box.
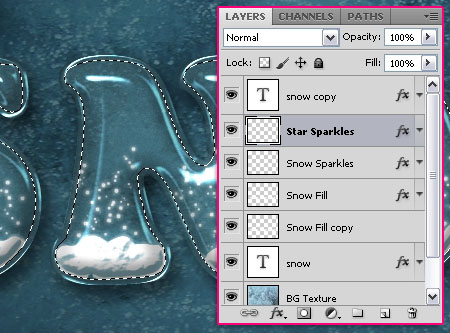
- Create a new layer on top of the “Snow Fill” layer, and call it “Snow Sparkles”.
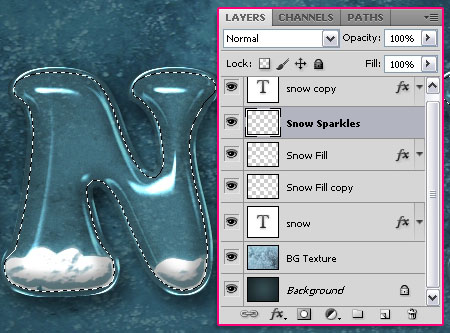
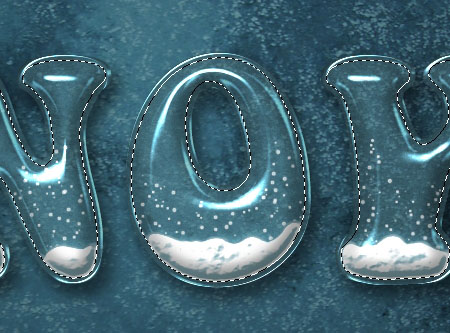
- Use the modified brush to scatter some snow in the lower half of the letters.
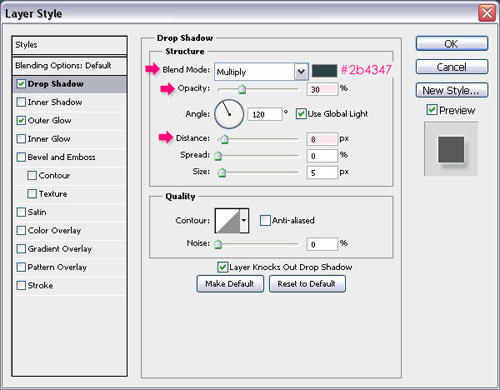
- Double click the “Snow Sparkles” layer to apply two simple Layer Styles:
- Drop Shadow: Change the color to #2b4347, the Opacity to 30%, and the Distance to8.
- Inner: Just change the color to #ffffff (White).
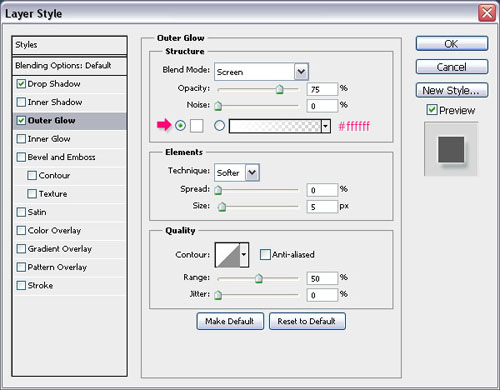
- This will add a nice glow.
Step 6:
- Create a new layer on top of the “Snow Sparkles” layer and call it “Star Sparkles”, and apply the same “Snow Sparkles” layer style to it. (Right click on the “Snow Sparkles” layer, choose Copy Layer Style, then right click on the “Star Sparkles” layer and choose Paste Layer Style.)
- In the Brush panel, choose a brush from the Brushes O5 set, (the one used here is “467986″), then change its settings as shown below:
- Brush Tip Shape:

- Shape Dynamics:
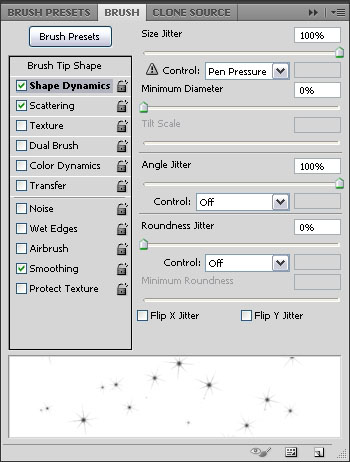
- Scattering:
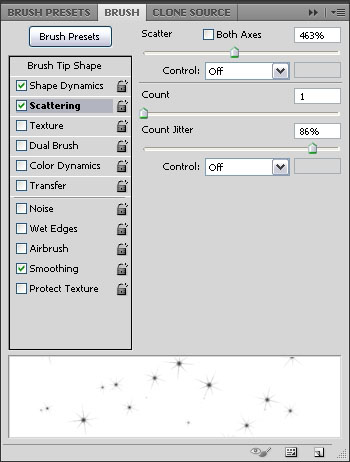
- Scatter some sparkles inside the letters.
Step 7:
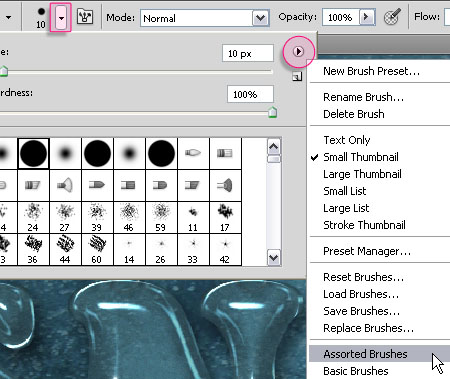
- Select the Brush Tool, and open the Brush Preset Picker. Click the pop-up menu icon in the top right corner, then, click on Assorted Brushes.
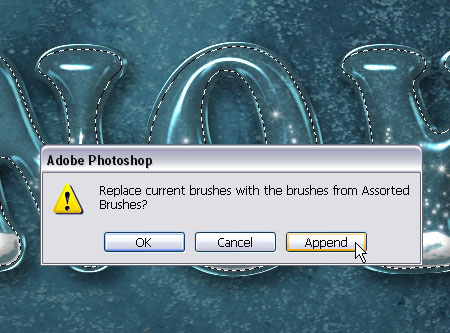
- Click Append to add the brushes to your current set.
- Pick the Diamond brush, and modify its settings as shown below:
- Brush Tip Shape:
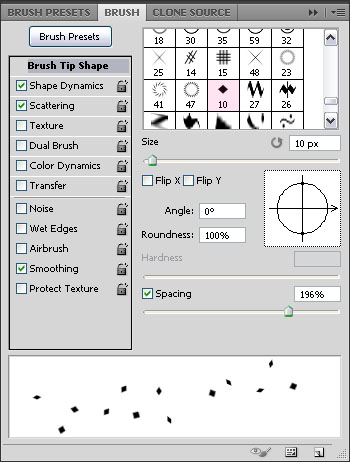
- Shape Dynamics:
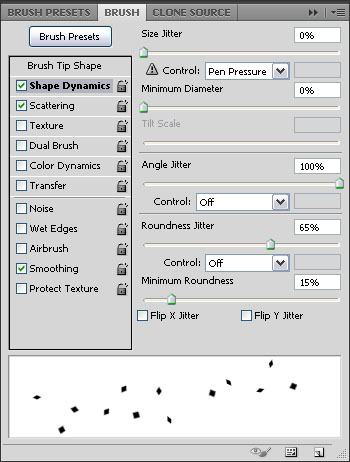
- Scattering:

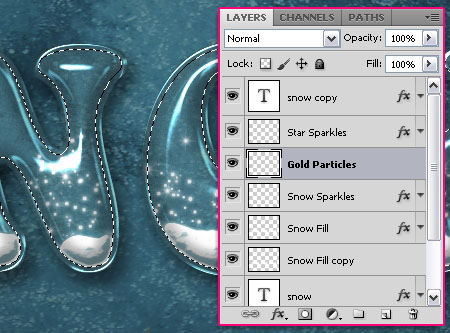
- Create a new layer on top of the “Snow Sparkles” layer and call it “Gold Particles”.
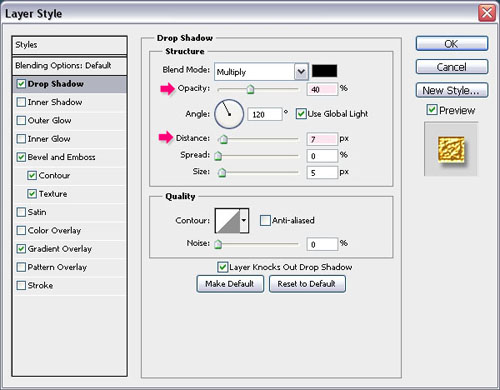
- Double click the “Gold Particles” layer to apply the following Layer Styles:
- Drop Shadow: Change the Opacity to 40%, and the Distance to 7.
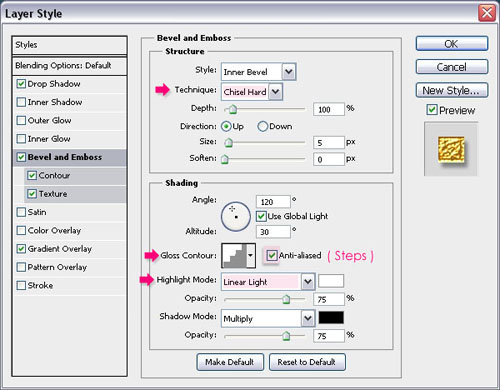
- Bevel and Emboss: Change the Technique to Chisel Hard, the Gloss Contour toSteps, check the Anti-aliased box, and change the Highlight Mode to Linear Light.
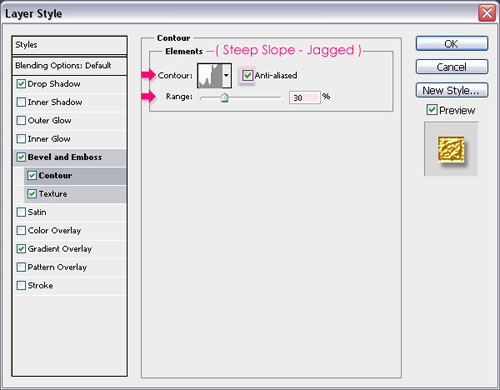
- Contour: Choose the Steep Slope – Jagged Contour, check the Anti-aliased box, and change the Range to 30%.
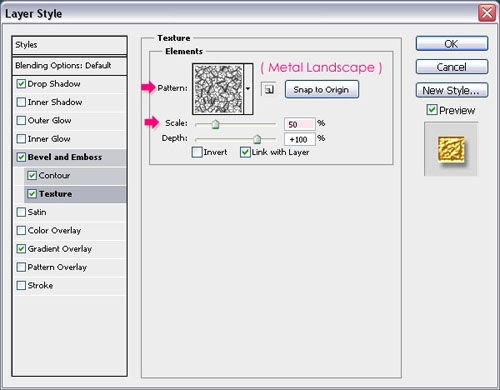
- Texture: Choose the Metal Landscape Contour, and change the Scale to 50%.
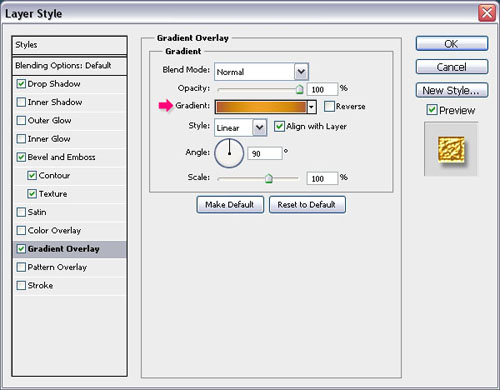
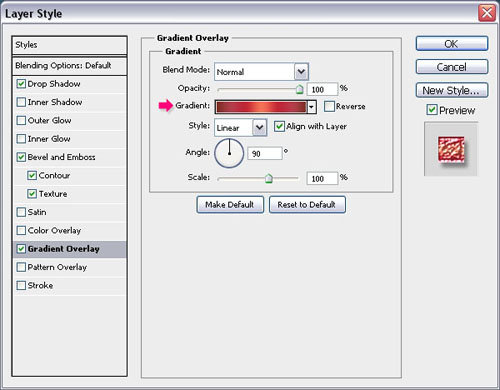
- gradient Overlay: You can have fun with this. Choose any gradient you like, and it will work! You can download the one used here as well.
- Duplicate the “Gold Particles” layer and rename it to “Red Particles”, then double click it to apply a different Gradient Overlay. This one is available for download too.
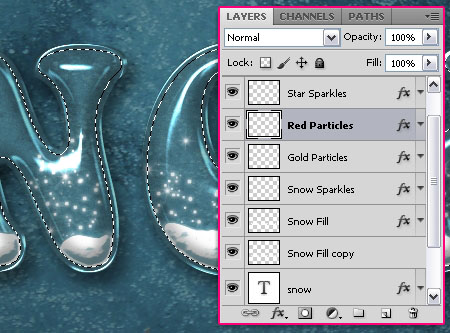
- Select the “Gold Particles” layer so that it is the active layer, and add some particles using the modified “Diamond” brush.
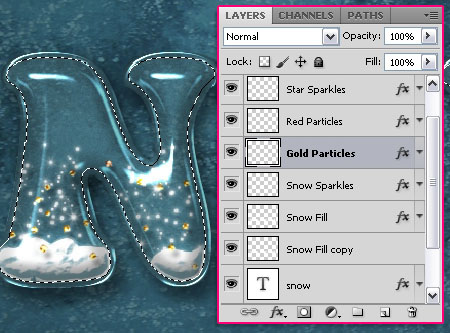
- Then, select the “Red Particles” layer, and add more particles.
- Once you’re done, go to Select -> Deselect (or press Ctrl + D) to get rid of the selection.
Step 8:
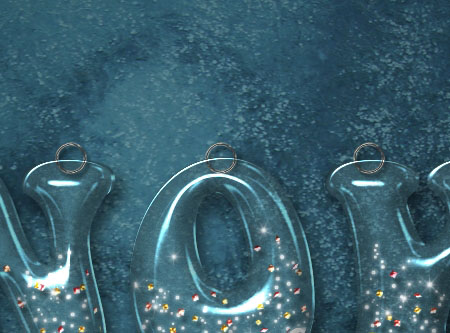
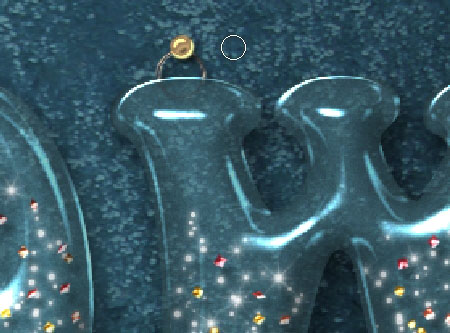
- Pick the Ellipse Tool, and click the Paths icon in the Options bar. Then, create a new layer on top of the “Star sparkles” layer and call it “Hangers”.
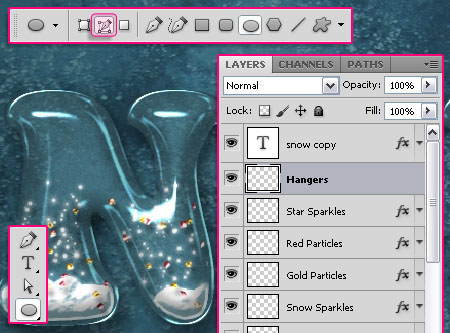
- Draw a small circle so that its center intersects with the letter’s top.
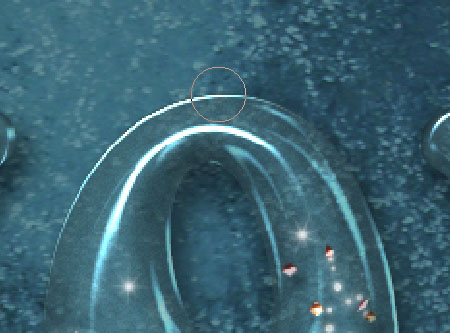
- Pick a hard round brush, and set its Size to 3 px.
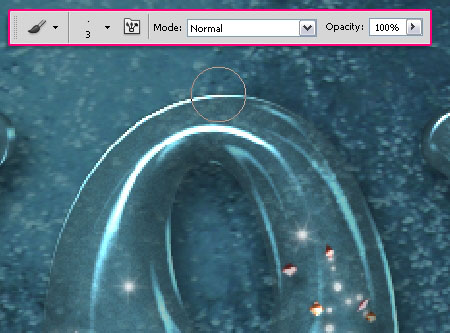
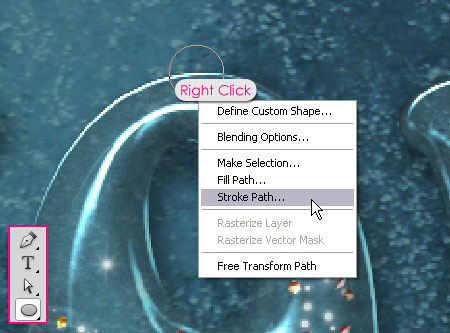
- Pick the Ellipse Tool again, set the Foreground color to White, make sure that the “Hangers” layer is still active (selected), right click on the path (circle) you created, and choose Stroke Path .
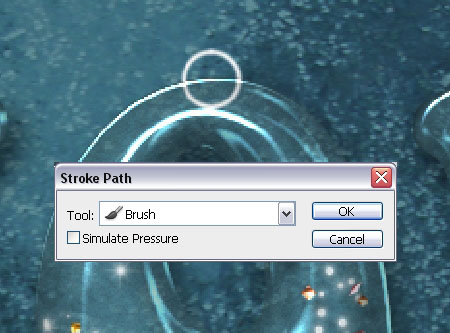
- Choose Brush from the Tool drop down menu and make sure that the Simulate Pressure box is un-checked. Hit Enter to get rid of the path.
- Duplicate the layer to add hangers for all the other letters.
- Select all the duplicated “Hangers” layers, then go to Layer -> Merge Layers (or press Ctrl + E) to merge them all in one layer.
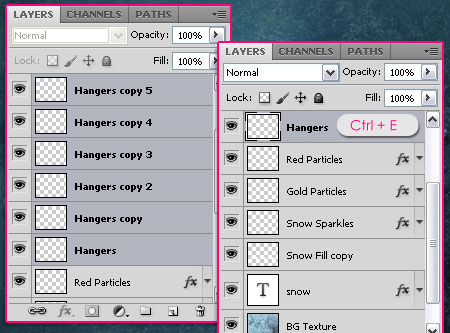
- Apply this Layer Style to the merged layer.
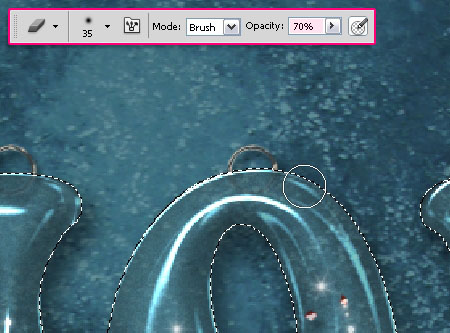
- Select the text (Ctrl + click on a text layer’s thumbnail), then pick the Eraser Tool, set itsOpacity in the Options bar to 70%, and erase the inner half of the hangers. Once you’re done, press Ctrl + D to get rid of the selection (Select -> Deselect).
- Create a new layer on top of the “Hangers” layer and call it “Pins”, then, apply this Layer Style to it. Choose a hard round brush and set its Size to 15 px.
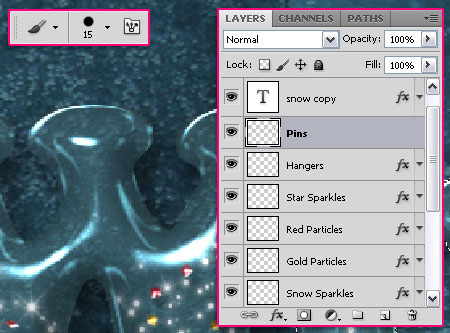
- Click once to add a pin on the top of each hanger.
Once your pretty snow globe letters are all hung up, you’re done!
Categories:
Text Effect


0 comments:
Post a Comment